How to setup Github Actions authentication with AWS using OIDC
+ setting custom sub templates

Either you are new to Github Actions or new to AWS, understanding how the two work together to ensure only the right users have access to the right resources is crucial for the success of your project.
You really don’t want to get a surprise bill with resources you didn’t provision
It may seem like is easier just to create an IAM user and call it a day, but this solution will quickly become tech debt as you are deciding you want to maintain long term credentials, which includes rotating them
In this post you’ll learn that is easier to pay extra time understanding OIDC integration between Github Actions and AWS
Create an OIDC Identity Provider in AWS
Go to the AWS Management Console and navigate to the IAM (Identity and Access Management) service.

In the left navigation pane, choose "Identity Providers."
Click on "Add Provider" and select "OpenID Connect."
Enter a name for your identity provider and specify the OIDC provider URL.

URL: https://token.actions.githubusercontent.com
Audience: sts.amazonaws.com
Click on
Get thumbprintScroll down and click
Add Provider
Identity Providers allow AWS to identify incoming tokens, anyone using Github Actions can request an token, next we need to create an IAM role that will allow only an specific Github repo to assume that identity
Create IAM Role in AWS
Go to the AWS Management Console and navigate to the IAM (Identity and Access Management) service.

Click on
Create RoleSelect Identity Provider
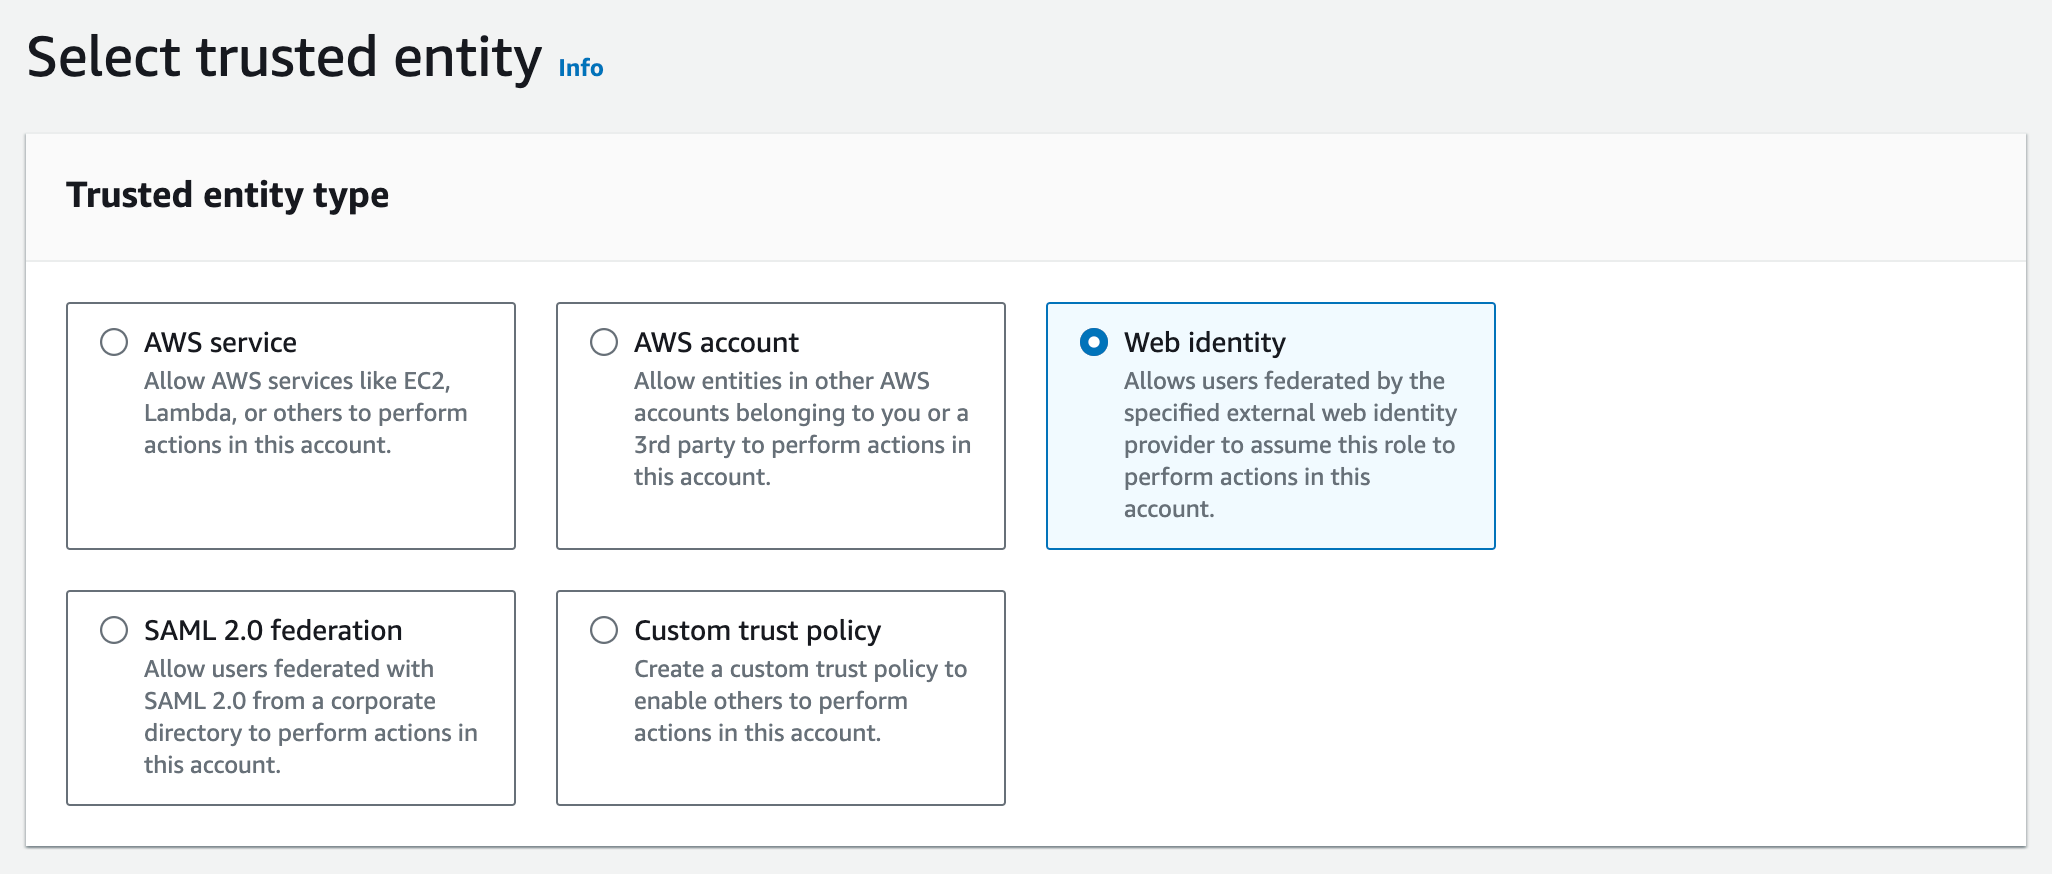
Select provider:
https://token.actions.githubusercontent.comSelect audience:
sts.amazonaws.comAdd Github Organization which is the repo account owner
Add repo name

Skip the branch name, will get to advanced filtering later
In this example, I’ll provide read only access to S3 to test the setup
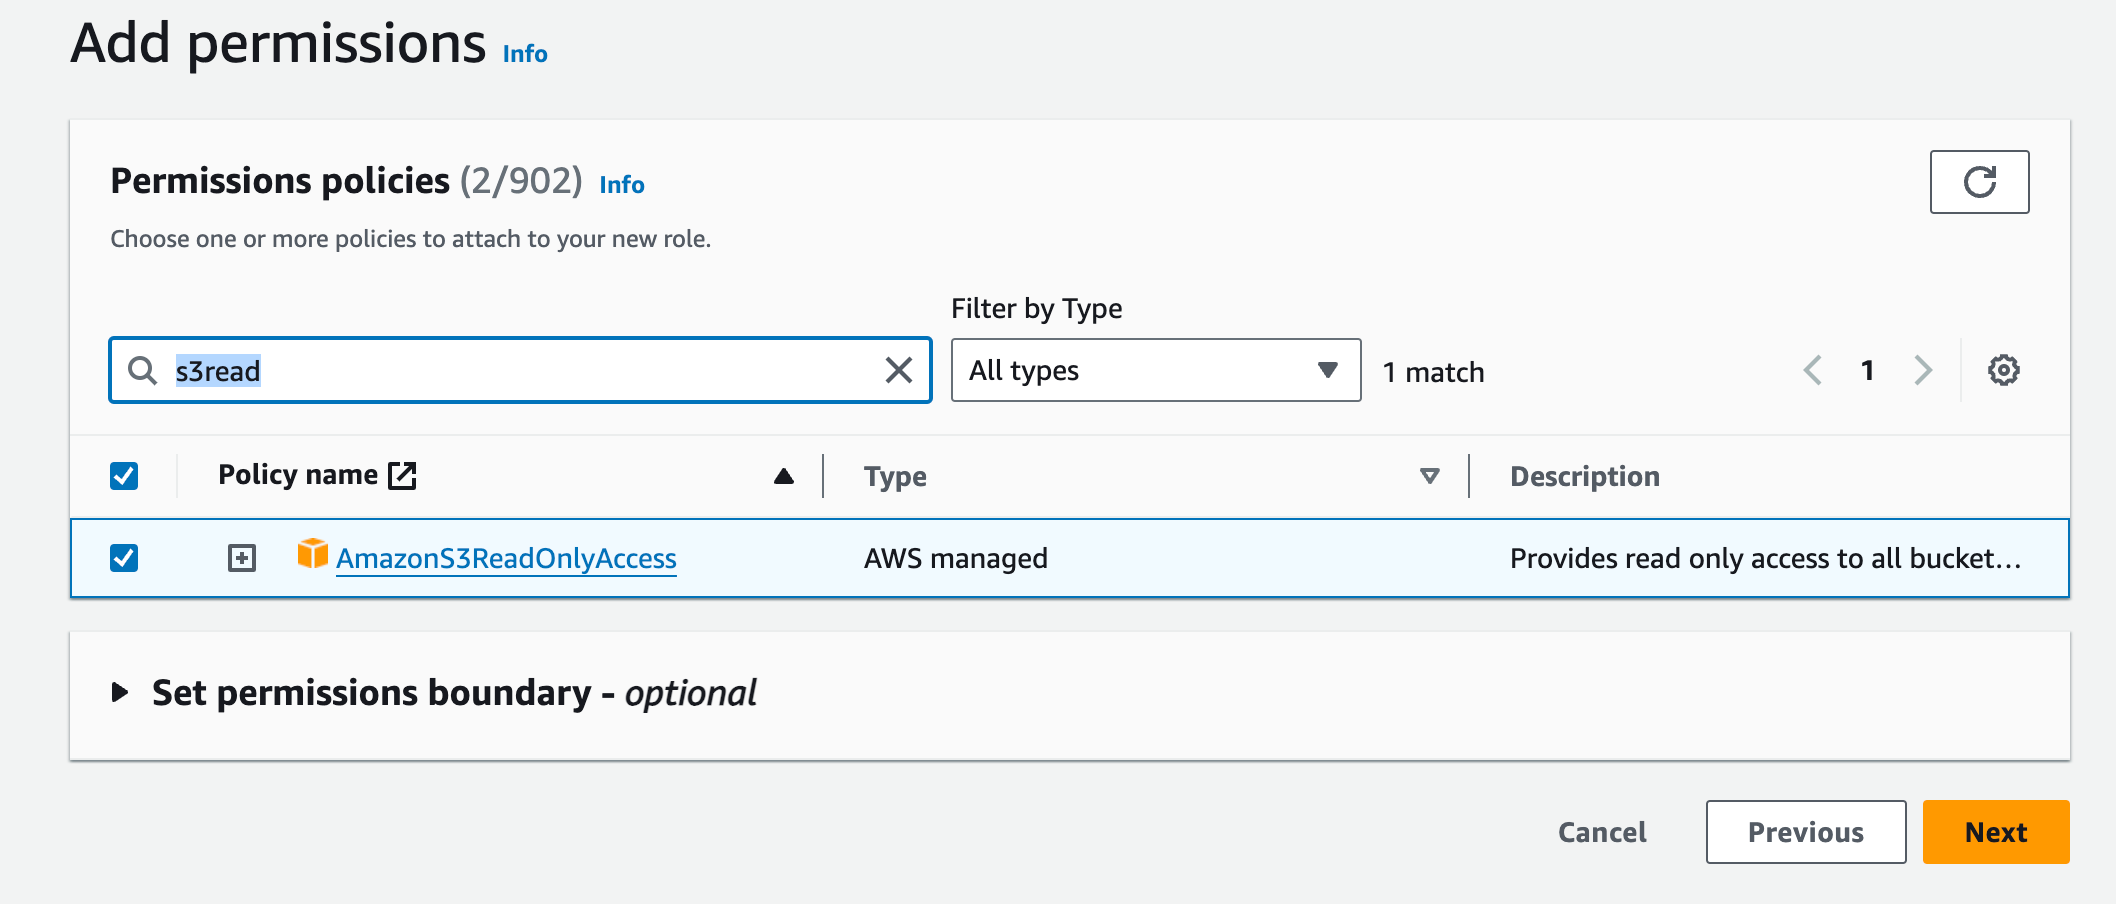
Search for
s3readClick checkbox next to
AmazonS3ReadOnlyAccessClick next
⚠️ This role will have access to all objects in S3 in all regions in this account ⚠️
Finally, we need to provide the role name, this is going to be the name the Github Action workflow will use to authenticate with AWS

Click
Create Role
⚠️ Anyone with access to the repo will have access to this AWS Role
it includes Github users that can create pull requests ⚠️
Finally, search for the Role that you just created and copy the ARN

Create a Github Action Workflow
Create a file
.github/workflows/s3.yamlwith following minimal steps
on:
  push:

jobs:
  show-buckets:
    name: List S3 Buckets
    runs-on: ubuntu-latest
    permissions:
      id-token: write # This will tell Github to provide a GITHUB_TOKEN
      contents: read  # This allow git checkout
    steps:
    - name: Configure AWS Credentials
      uses: aws-actions/configure-aws-credentials@v4
      with:
        role-to-assume: arn:aws:iam::<AWS-ACC>:role/github-s3-read-only
        aws-region: us-west-2
    - name: List S3 Buckets
      run: aws s3 ls
Replace
role-to-assumethe ARN of the role you created before
Advance Role Authentication
Go to Role - Trust Relationship

This would be the trust policy:
{
    "Version": "2012-10-17",
    "Statement": [
        {
            "Effect": "Allow",
            "Principal": {
                "Federated": "arn:aws:iam::<AWS-ACCOUND-ID:oidc-provider/token.actions.githubusercontent.com"
            },
            "Action": "sts:AssumeRoleWithWebIdentity",
            "Condition": {
                "StringEquals": {
                    "token.actions.githubusercontent.com:aud": "sts.amazonaws.com"
                },
                "StringLike": {
                    "token.actions.githubusercontent.com:sub": "repo:alonch/oidc-demo:*"
                }
            }
        }
    ]
}Principal: who issued the token
Action: AssumeRoleWithWebIdentity provides a Github token with AWS credentials with this role
Condition: Special field that AWS uses to add custom authentication conditions docs, other common use cases for this field is to allow access depending on resource tags
StringEquals/StringLike: These are operations provide by AWS IAM full list in the docs.
StringEquals: will expect the aud (JWT Audience) to be equals to sts.amazonaws.comStringLike: allows the use of wildcards (*), will expect the incoming sub (JWT Subject) to start with repo:alonch/oidc-demo:
To avoid information leakage, the Subject is the default method of authorization, its structure changes depending on the workflow trigger, assuming the repo is: alonch/oidc-demo these would be the subjects for the following workflows
Environment
when the job specifies an environment, for example:
on:
  push:

jobs:
  show-buckets:
    name: List S3 Buckets
    runs-on: ubuntu-latest
    environment: production
    ...
it doesn’t matter the trigger, the Sub will always be the following:
repo:alonch/oidc-demo:environment:productionOn push - Branch
When the workflow runs on specific branch, for example
on:
  push:
    branches:
      - main

jobs:
  show-buckets:
    name: List S3 Buckets
    runs-on: ubuntu-latest
    ...
The Sub would be:
repo:alonch/oidc-demo:ref:refs/heads/mainOn Push - Tags
When the workflow runs on Tags, for example:
on:
  push:
    tags:
      - v*

jobs:
  show-buckets:
    name: List S3 Buckets
    runs-on: ubuntu-latest
    ...
The Sub would be:
repo:alonch/oidc-demo:ref:refs/tags/v1.0.0On Pull Request
When the workflow runs on Pull Requests
on:
  pull_request:

jobs:
  show-buckets:
    name: List S3 Buckets
    runs-on: ubuntu-latest
    ...
The Sub would be:
repo:alonch/oidc-demo:pull_requestCustomizing Subject
Sometimes a more sophisticated authorization is required, for example, you may want to restrict access to particular workflow specially useful for Reusable Workflows, in that case we would need to override the default Subject template using REST
Prerequisites
Generate a Github personal access token (PAT) with repo admin access,
Go to Github Session → Developer Settings → Personal access tokens (link)
Select
repoClick
Generate Token

Copy the token
Open a terminal and execute the following with the token generated
export GITHUB_TOKEN=<TOKEN>Modifying the default Subject template
Github OIDC provides the following attributes
{
  "typ": "JWT",
  "alg": "RS256",
  "x5t": "example-thumbprint",
  "kid": "example-key-id"
}
{
  "jti": "example-id",
  "sub": "repo:octo-org/octo-repo:environment:prod",
  "environment": "prod",
  "aud": "https://github.com/octo-org",
  "ref": "refs/heads/main",
  "sha": "example-sha",
  "repository": "octo-org/octo-repo",
  "repository_owner": "octo-org",
  "actor_id": "12",
  "repository_visibility": "private",
  "repository_id": "74",
  "repository_owner_id": "65",
  "run_id": "example-run-id",
  "run_number": "10",
  "run_attempt": "2",
  "runner_environment": "github-hosted"
  "actor": "octocat",
  "workflow": "example-workflow",
  "head_ref": "",
  "base_ref": "",
  "event_name": "workflow_dispatch",
  "ref_type": "branch",
  "job_workflow_ref": "octo-org/octo-automation/.github/workflows/oidc.yml@refs/heads/main",
  "iss": "https://token.actions.githubusercontent.com",
  "nbf": 1632492967,
  "exp": 1632493867,
  "iat": 1632493567
}
In our example, we want to use job_workflow_ref to ensure only a specific workflow is allowed to assume the AWS Role
Edit: ⚠️ Remember that anyone with access to this callable workflow can run it, this is not recommended for public repos ⚠️
  -X PUT \
  -H "Accept: application/vnd.github+json" \
  -H "Authorization: Bearer $GITHUB_TOKEN" \
  -H "X-GitHub-Api-Version: 2022-11-28" \
  https://api.github.com/repos/alonch/oidc-demo/actions/oidc/customization/sub \
  -d '{"use_default":true,"include_claim_keys":["job_workflow_ref"]}'
⚠️ Ensure to replace alonch/oidc-demo with your repo ⚠️
Update IAM Role - Trust Relationship
{
	"Version": "2012-10-17",
	"Statement": [
		{
			"Effect": "Allow",
			"Principal": {
				"Federated": "arn:aws:iam::<AWS-ACCOUNT>:oidc-provider/token.actions.githubusercontent.com"
			},
			"Action": "sts:AssumeRoleWithWebIdentity",
			"Condition": {
				"StringEquals": {
					"token.actions.githubusercontent.com:aud": "sts.amazonaws.com",
					"token.actions.githubusercontent.com:sub": "job_workflow_ref:alonch/oidc-demo/.github/workflows/s3.yaml@refs/heads/main"
				}
			}
		}
	]
}
Before we needed to use a wildcard (*), for that we needed to use the condition StringLike, now that we are specifying an specific Subject, we can use StringEquals
Hope this tutorial gave you enough information to securely integrate Github Actions with AWS